

Registration Setup
This article covers the Micepad Registration setup. Micepad allows you to set up free or paid event registration in the form of RSVP or Ticketing.
For Free/RSVP events → Setup RSVP form for registrants to respond to their event RSVP
For Free/Paid/Chargeable Ticketed events → Setup ticket types and set ticket prices for your event registrants to select and purchase their event tickets
Note: It is advisable for attendees are to register for Free Events utilising RSVP or Ticket Registration to confirm their attendance.
Complete the following to successfully set up your event registration:
- Access Registration on admin panel
- Set up RSVP Registration
- Create New RSVP Form
- Language setting
- Add/Remove form fields
- Preview RSVP
Access Registration on admin panel
From the event admin panel, select "Registration" from the top panel.
Note: Admins can view list of registered attendees from the Attendees admin panel.
Set up RSVP Registration
Admins can configure RSVP form to accommodate requirements suitable for event RSVP. RSVP forms are useful when you would like to collect RSVP invitation responses from your invited attendees.
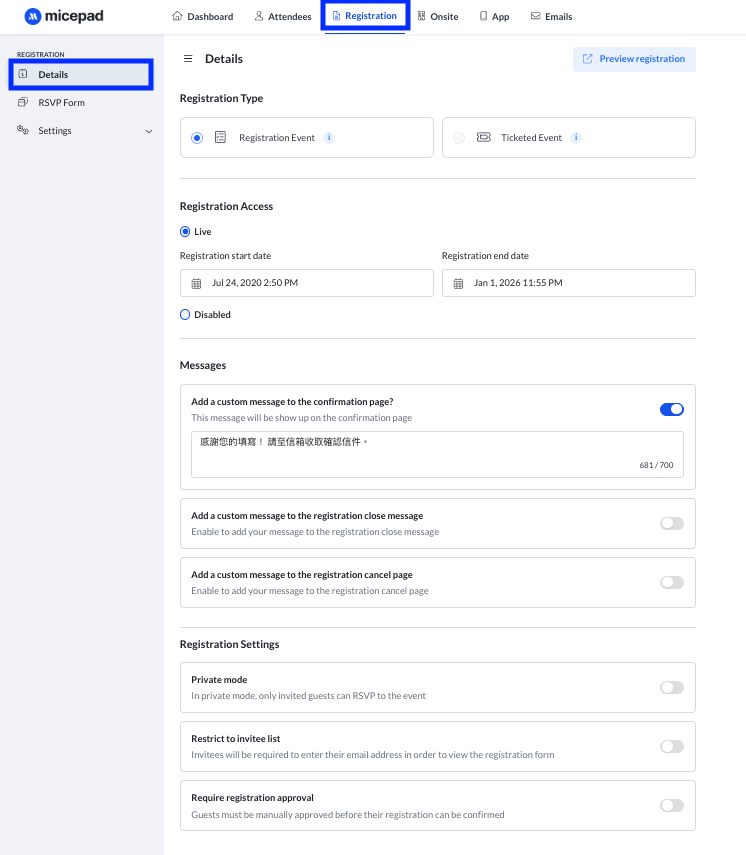
Registration Details
Select Registration from the top panel → On the Registration Details page, you can enable custom messages for RSVP confirmation or Registration close
 Create New RSVP Form
- On the Registration Details page, enable/disable custom messages for RSVP confirmation or Registration close
- Directly click the default Registration Form for general registration or create multiple RSVP forms for different attendee group
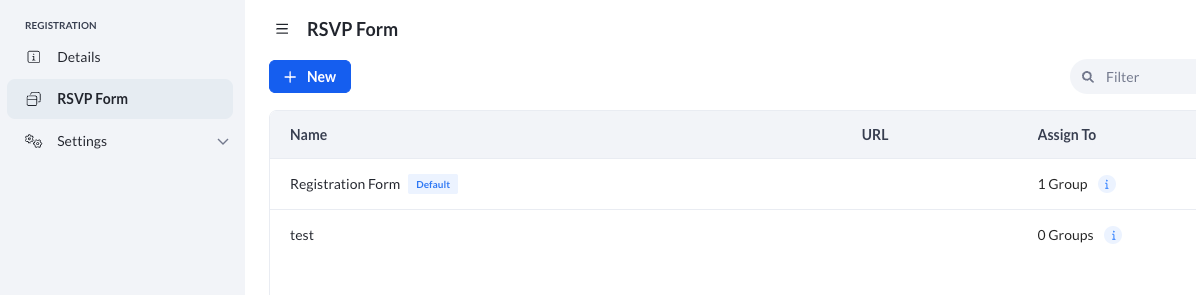
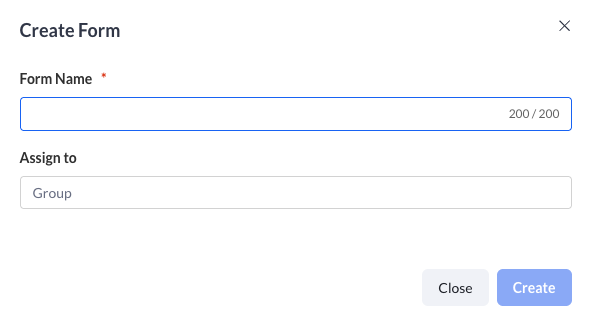
Click "+New" to add new RSVP form
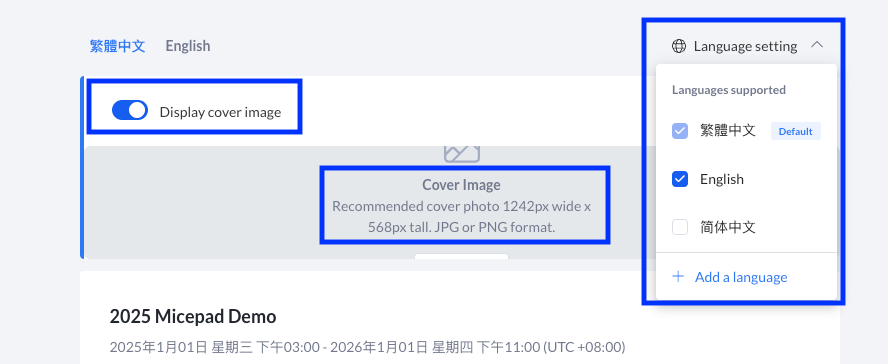
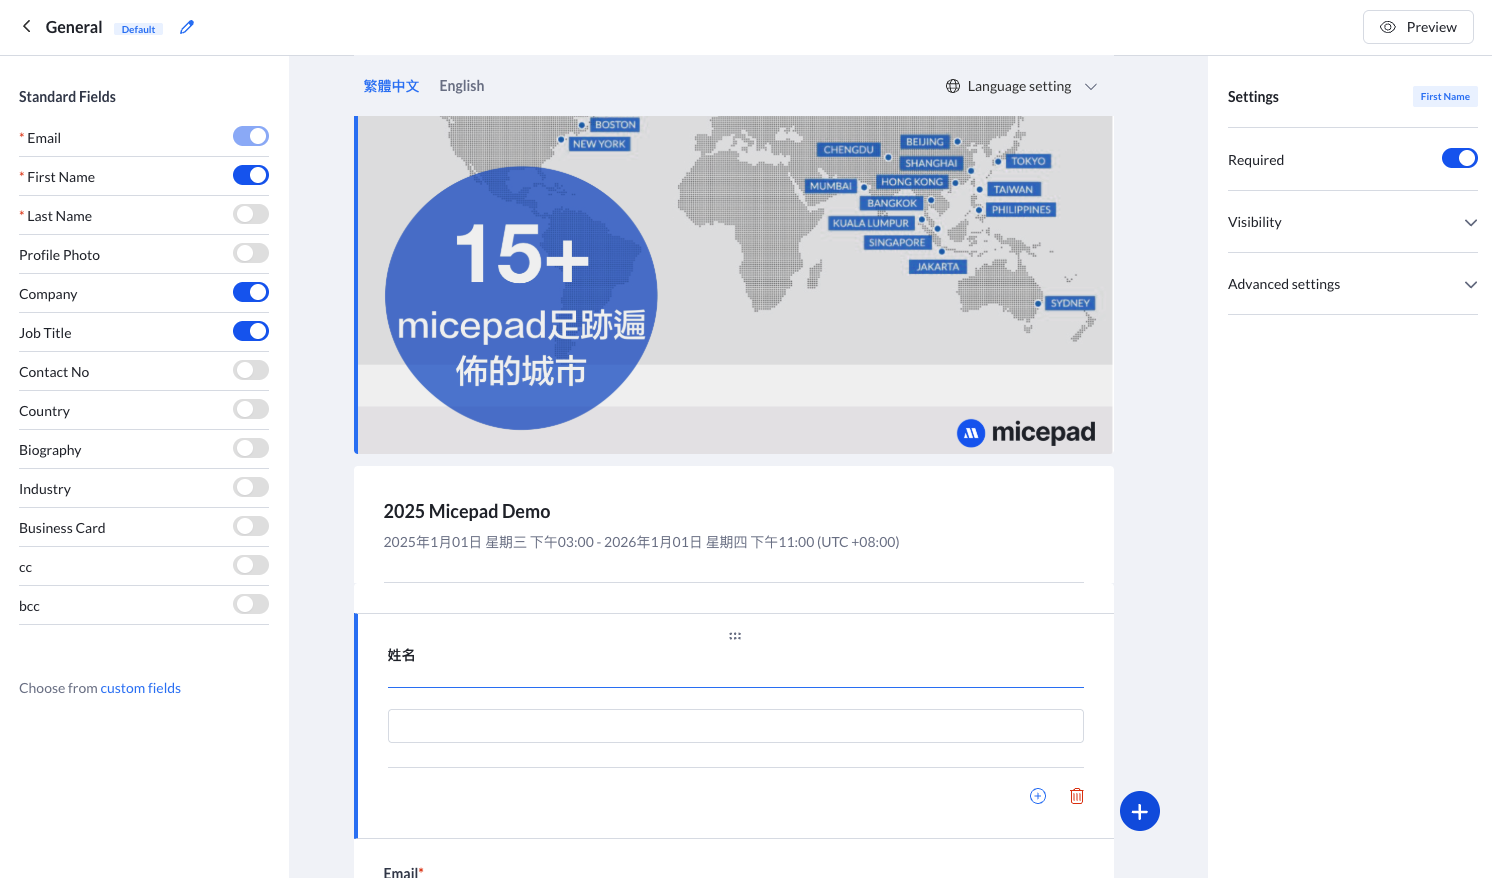
Language and Cover image setting
- if need multi language for global attendees, just click Language setting to add more language.
- Need to edit the field name for each language
- If need to add special banner for registration form, click grey Cover Image and choose image from popup page, after upload image, switch on Display cover image
Add or Remove form fields
- RSVP Form → General → Enable or Disable Standard Fields from left panel
- To add new custom fields, select any field on the right and click on the "+" icon and select a custom field
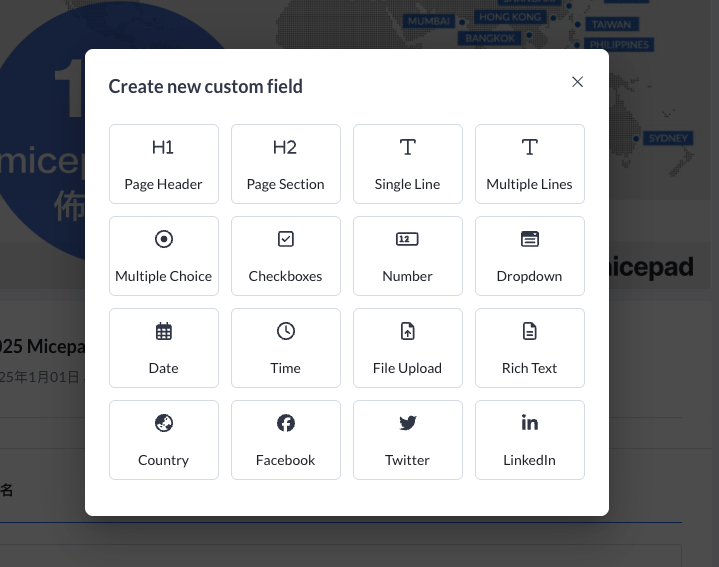
To set question visibility → Click "Visibility" and set necessary conditions
Preview RSVP Form
To preview RSVP Form → Click "Preview" icon at the top right of page
Note: Useful to test out RSVP Form, especially dependent question fields during event setup.